SVG Tracer: free image to SVG converter
Turn a PNG, JPG or photo into a clean vector SVG. Logos and cartoons come out as flat colours with the shading removed, photos keep every detail with real gradients, and stencils come out in crisp black and white. It all runs in your browser, so your image never leaves your device.
No image handy? Try or
Flat-colour art: logos, decals, stickers, cartoons.
Colours
Every shaded area becomes one solid colour, so you don't get five shades where there should be one.
The colours found in your image show up here.
Higher keeps subtle shades apart. Lower merges them into fewer colours.
Shapes
Higher gives longer, calmer curves and fewer nodes. Lower follows the pixels more closely.
Higher keeps more sharp corners. Lower rounds them off.
Merges any blob smaller than this square into the colour around it. Raise it to clean up dust, noise and stray dots.
Output & quality
Leaves the background colour out, so the SVG is transparent there.
Drop an image hereTurn any image into an SVG
or try or
Choose an image to start.
From image to SVG, detail intact
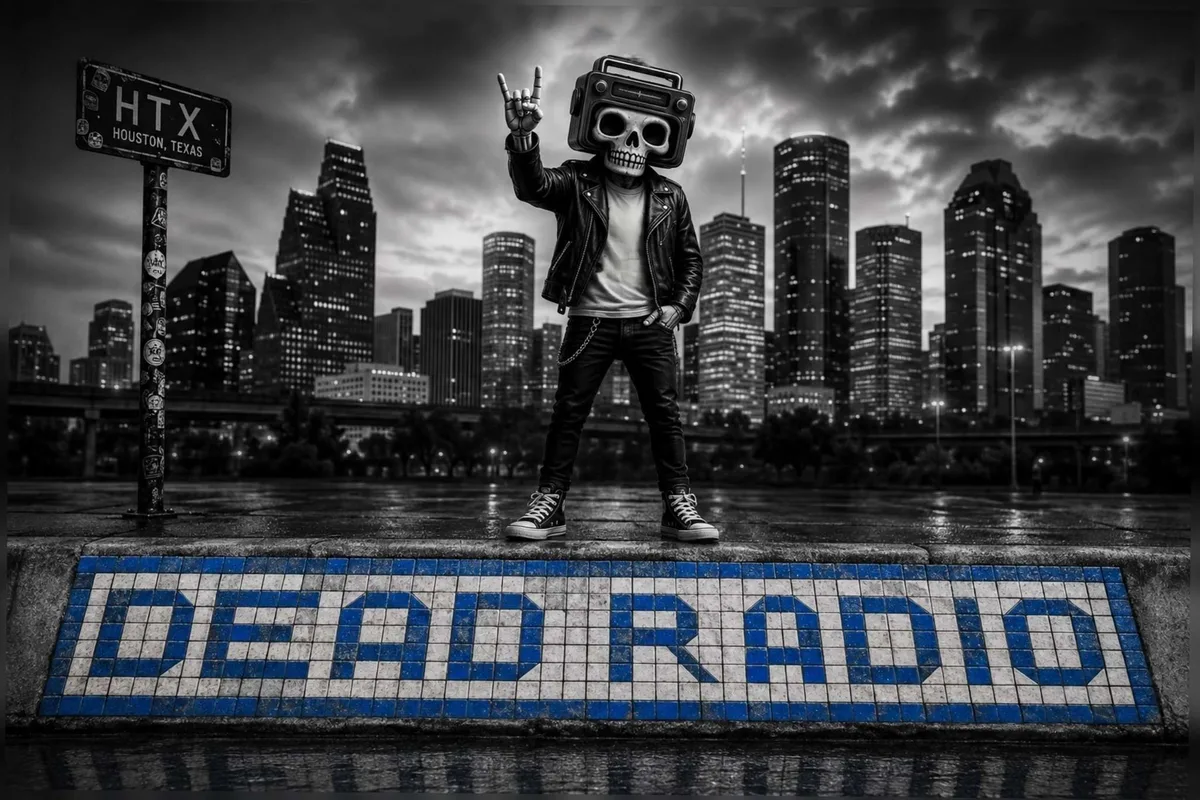
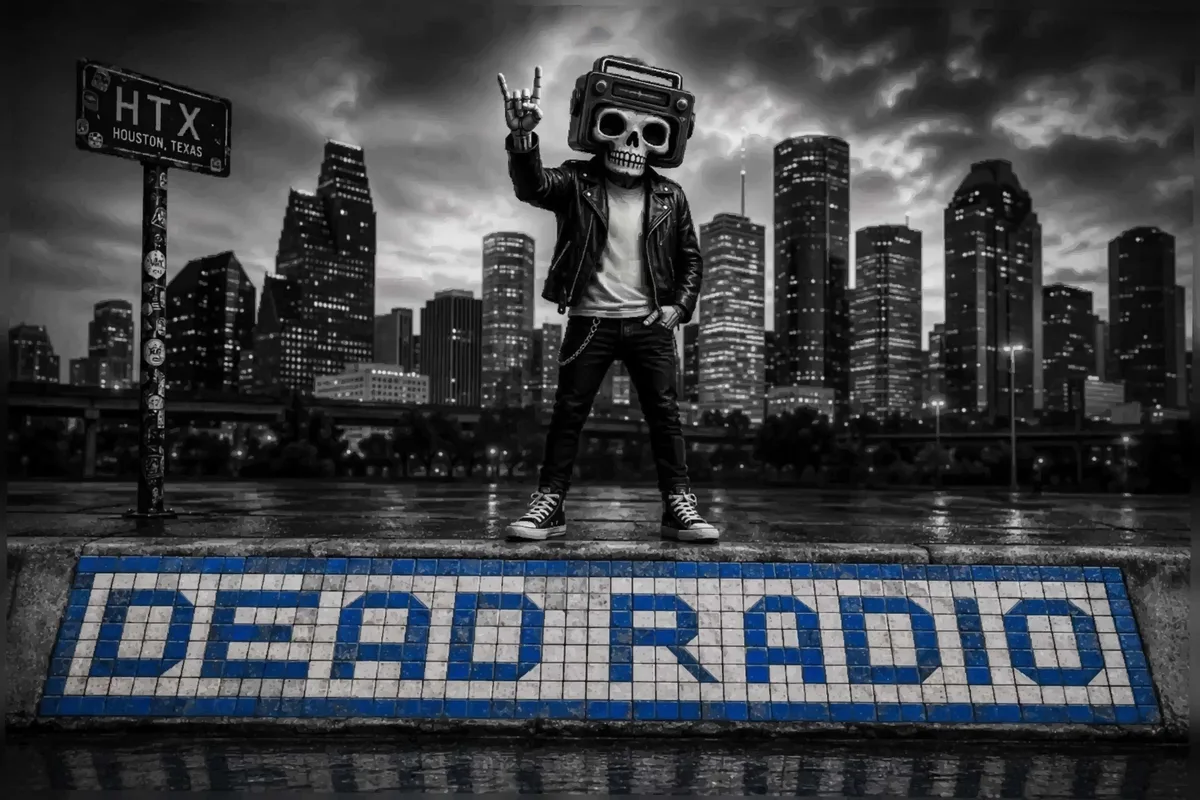
Dead Radio, a busy black and white photo-style piece with a skull, a leather jacket, a stormy sky and a tiled sign, traced in Detailed mode. Every shape in the SVG on the right is a real vector, so it stays sharp at any size.
How to convert an image to SVG
- Add your image. Choose a PNG, JPG or WebP, drop it on the page or paste it. Use the biggest version you have.
- Pick a mode. Colour for logos, decals and cartoons (switch on Remove shading for flat colours), Black & white for stencils and cut files, Detailed for photos and shaded artwork.
- Check it. Drag the compare line, zoom in, and adjust colours, smoothness and specks until it looks right.
- Download. Save the SVG, copy the code, or download one SVG per colour for cutters and multicolour 3D prints.
Built for artwork
Logos, decals, emblems, stickers and line art come out as smooth curves with sharp corners kept sharp. Anti-aliased and JPEG edges are cleaned up first, so you get no coloured fringes or slivers.
No gaps between colours
Each edge between two colours is traced once and shared by both shapes, so they always meet exactly. Pick separate pieces for vinyl cutters, laser cutters and multicolour 3D prints.
Private and free
The tracing runs on your own device. Your image is never uploaded, and there is no sign-up, watermark or limit.
Tips for the cleanest trace
Which images trace best?
Any image works, as long as you pick the right mode. Logos, decals, badges, stickers, icons and cartoons work best in Colour mode. Photos, renders and shaded artwork belong in Detailed mode. The bigger and sharper the image, the more detail survives, so use the largest version you have.
How do I remove the shading and get flat colours?
In Colour mode, switch on Remove shading. Each area that is shaded from light to dark becomes one solid colour, while real outlines stay where they are. Use Shading removal to choose how strongly it flattens: Strong for cartoons and logos, Light for photos.
Can I convert a photo to SVG?
Yes. Use Detailed mode. It splits the photo into thousands of shapes that follow its edges and fills shaded ones with real SVG gradients, so the result looks like the photo but scales like a vector. Files are bigger than a logo's, so lower the level of detail if you need a smaller file.
Can the SVG match my image exactly?
Yes. In Detailed mode, set the level of detail to Pixel-exact or Identical. The tracer works on your image's own pixel grid, checks every area against the original, and keeps splitting any area that is off until it matches. At 100 % size, Identical gets over 99 % of pixels within 2 shades of the original. The files are large, so use it when the match matters more than the file size.
A small colour went missing. How do I get it back?
Use Pick a missing colour and click that colour on the image. It is added to the palette and the image is traced again. You can also raise Colour detail, or switch off automatic colours and set the number yourself.
How do I change or remove a colour?
Click a swatch to give that colour a new value in the SVG. The eye button hides a colour so it is left out of the file, and the cross removes it so its areas are taken over by the colours around them.
Stacked or separate pieces?
Stacked fills holes under the shapes on top, which hides the hairline seams some viewers show between touching shapes. Separate pieces never overlap, which is what cutting machines and multicolour 3D printing need. Use Layers to download one SVG per colour.
How do I make a 3D print from the SVG?
Most slicers, including Bambu Studio, OrcaSlicer and PrusaSlicer, can import an SVG and extrude it. For a layered sign or a stencil, our layered sign and stencil generators take an image directly.
Is my image uploaded anywhere?
No. The whole trace happens in your browser. Nothing is sent to a server.
Is it really free?
Yes. There is no sign-up, no watermark and no limit on how many images you convert.
Which file types can I convert?
PNG, JPG, WebP, GIF, BMP and AVIF images. The result is a standard SVG that works in Cricut Design Space, Silhouette Studio, Inkscape, Illustrator, Figma, LightBurn and 3D printing slicers. For cutting machines and LightBurn, use Colour or Black & white mode with separate pieces.